Getting started
Setting up your Raspberry Pi
Edit this on GitHub
To get started with your Raspberry Pi computer, you’ll need the following accessories:
A computer monitor or television. Most should work as a display for the Raspberry Pi, but for best results, you should use a display with HDMI input. You’ll also need an appropriate display cable to connect your monitor to your Raspberry Pi.
A computer keyboard and mouse
-
Any standard USB keyboard and mouse will work with your Raspberry Pi.
-
Wireless keyboards and mice will work if already paired.
-
For keyboard layout configuration options, see raspi-config.
A good quality power supply.
We recommend the official Raspberry Pi Power Supply, which has been specifically designed to consistently provide +5.1V despite rapid fluctuations in current draw. Those fluctuations in demand are something that happens a lot when you’re using peripherals with the Raspberry Pi and something that other supplies—designed to provide consistent current for charging cellphones—usually don’t cope with all that well. It also has an attached micro USB cable, which means that you don’t accidentally use a poor-quality cable—something that can be an issue.
For the Raspberry Pi 4 Model B and Raspberry Pi 400, you should use the type C power supply; for all other models, you should use the micro USB power supply.
Finally, you’ll need an SD card; we recommend a minimum of 8GB micro SD card and use the Raspberry Pi Imager to install an operating system onto it.
Connecting a Display
Unless you’re setting up your Raspberry Pi to operate headless, for regular use, you’ll want to plug the Raspberry Pi into a display: either a computer monitor or a television.
Your Raspberry Pi has an HDMI port which you can connect directly to a monitor or TV with an HDMI cable. This is the easiest solution; some modern monitors and TVs have HDMI ports, and some do not, but there are other options.
|
Note
|
The Raspberry Pi 4 has two micro HDMI connectors, which require a good-quality micro HDMI cable, especially when using 4K monitors or television. Raspberry Pi sells a suitable cable. |
If you’re using your Raspberry Pi with a monitor with built-in speakers and are connecting to it using an HDMI cable, you can also use it to output sound. For monitors with a DVI port, you can use an HDMI-to-DVI cable or an HDMI cable with a DVI adapter. In addition, you can use an HDMI-to-VGA adapter for older monitors that only support VGA.
|
Note
|
Unlike HDMI the DVI and VGA standards do not support audio. |
Finally, some models of Raspberry Pi have a composite out port for connecting to analog devices, but the type of connector varies depending on the model. The original Raspberry Pi used an RCA connector, and a standard RCA composite video lead will work. Other models (Raspberry Pi B+ and later) combine the audio and composite out onto the same 3.5mm jack. This requires a particular type of lead, with audio left on the tip, audio right on ring 1, ground on ring 2, and video on the sleeve. This is the same as leads used on the Zune and on Apple devices.
More information on connecting to a monitor can be found in as part of the Raspberry Pi Foundation’s Learning Resources.
SD Cards for Raspberry Pi
Raspberry Pi computers use a micro SD card, except for very early models which use a full-sized SD card.
|
Warning
|
Because of a hardware limitation in the Raspberry Pi Zero, 1 and 2, the boot partition on the SD card must be 256GB or less otherwise the device will not boot up. Later models of Raspberry Pi 2 — with a BCM2837 SoC — along with the Raspberry Pi 3, 4, Zero 2 W, and the Raspberry Pi 400 do not have this limitation. This does not affect Raspberry Pi OS, which always uses a small boot partition. |
Recommended Capacity
We recommend using an SD card of 8GB or greater capacity with Raspberry Pi OS. If you are using the lite version of Raspberry Pi OS, you can use a 4GB card. Other operating systems have different requirements: for example, LibreELEC can run from a smaller card. Please check with the supplier of the operating system to find out what capacity of card they recommend.
Optional items
A network (Ethernet) cable to connect your Raspberry Pi to your local network and the Internet.
If you aren’t using an HDMI monitor with speakers you might also need some form of sound hardware. Audio can be played through speakers or headphones by connecting them to the AV jack (not available on the Raspberry Pi 400). However speakers must have their own amplification since the output from your Raspberry Pi is not powerful enough to drive them directly.
Troubleshooting
If you are having problems with your SD card:
-
Make sure you are using a genuine SD card. The best way to avoid fake SD cards is to always buy from a reputable supplier.
-
Make sure you are using a good quality power supply; we recommend using an official Raspberry Pi power supply.
-
The cable from the power supply unit to the Raspberry Pi can also cause problems. This is usually due to the resistance of the wires in the USB power cable; to save money, USB cables have as little copper in them as possible, which causes a voltage drop across the cable.
-
Make sure you shut down the operating system correctly before you power down the Raspberry Pi.
You can get help with setting up your Raspberry Pi on our forums.
Installing the Operating System
Edit this on GitHub
Raspberry Pi recommend the use of Raspberry Pi Imager to install an operating system on to your SD card. You will need another computer with an SD card reader to install the image. Raspberry Pi Imager can be run on another Raspberry Pi, but also works on Microsoft Windows, Apple macOS, and Linux.
|
Note
|
Before you start, don’t forget to check the SD card requirements. |
|
Important
|
NOOBS, or New Out Of the Box Software to give it its full name, was an SD card-based installer for Raspberry Pi computers; we no longer recommend or support using NOOBS. Going forward, please use Raspberry Pi Imager. |
Using Raspberry Pi Imager
Raspberry Pi have developed a graphical SD card writing tool that works on Mac OS, Ubuntu 18.04, and Windows called Raspberry Pi Imager; this is the easiest option for most users since it will download the image automatically and install it to the SD card.
Download the latest version of Raspberry Pi Imager and install it. If you want to use Raspberry Pi Imager from a second Raspberry Pi, you can install it from a terminal using sudo apt install rpi-imager. Then:
-
Connect an SD card reader with the SD card inside.
-
Open Raspberry Pi Imager and choose the required OS from the list presented.
-
Choose the SD card you wish to write your image to.
-
Review your selections and click on the
Writebutton to begin writing data to the SD Card.
|
Note
|
If using Raspberry Pi Imager on Windows 10 with controlled folder access enabled, you will need to explicitly allow Raspberry Pi Imager permission to write the SD card. If this is not done, the imaging process will fail with a "failed to write" error. |
|
Note
|
You can see which operating systems are most often downloaded, on our statistics page. |
You can now insert the SD card into the Raspberry Pi and power it up. When your Raspberry Pi boots for the first time a configuration wizard will run that allows you to set up your Raspberry Pi.
|
Note
|
In the past Raspberry Pi OS had a default user name and password; user name pi, with password raspberry. This is no longer the case. However if you are using an older version of the operating system, or you are working with an existing installation, this default user may be present. If you have not already done so, you should change the default password straight away to ensure your Raspberry Pi is secure.
|
Advanced Options
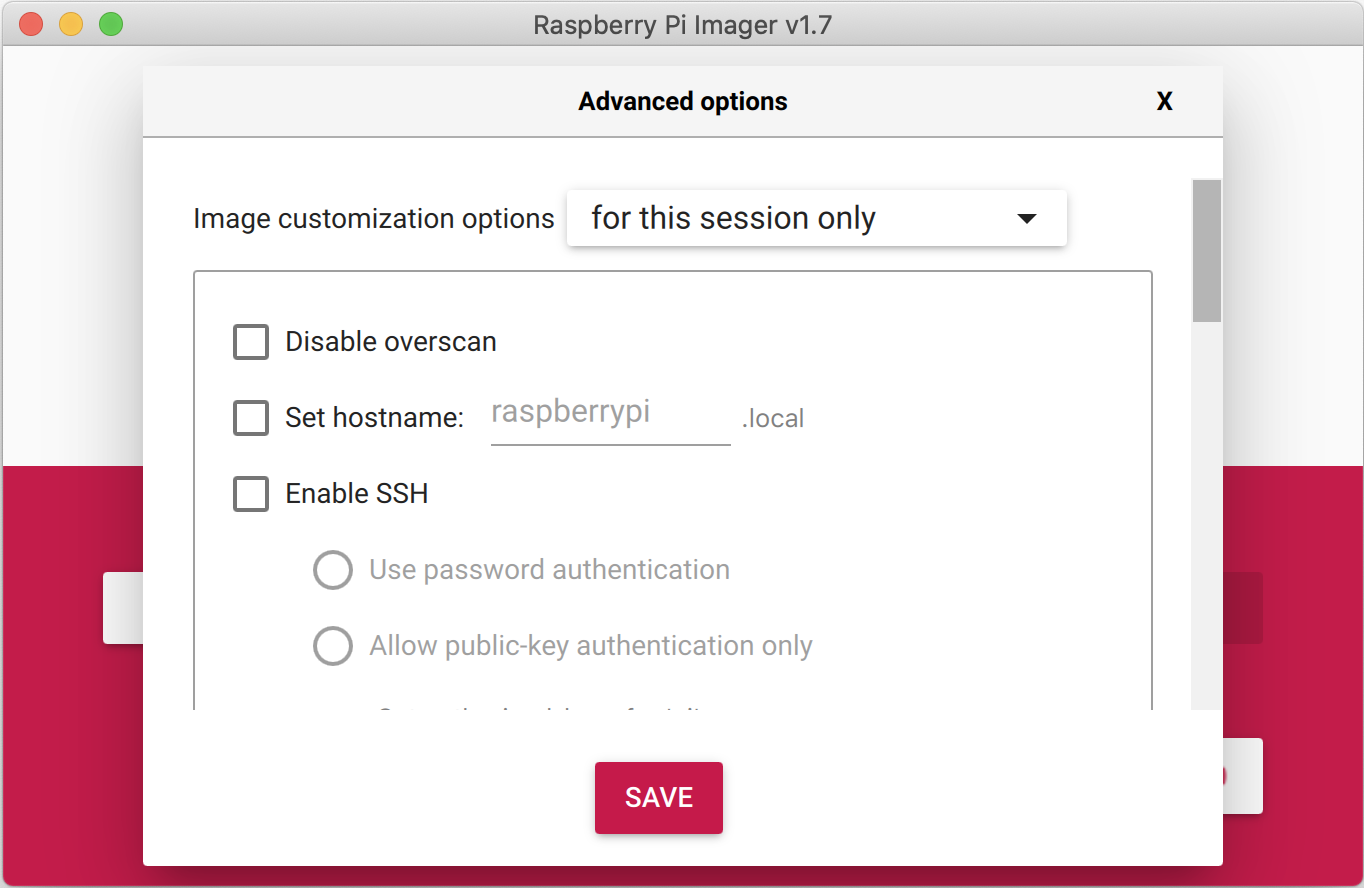
When you have the Raspberry Pi Imager open, and after you have selected the operating system to install, a cog wheel will appear allowing you to open an "Advanced Options" menu if it is supported by the operating system. This menu lets you carry out tasks like enabling SSH, or setting your Raspberry Pi’s hostname, and configuring the default user before first boot.
|
Note
|
If you use the Advanced Options menu in Imager to configure your Raspberry Pi OS installation then the configuration wizard that normally runs on first boot will be skipped. |
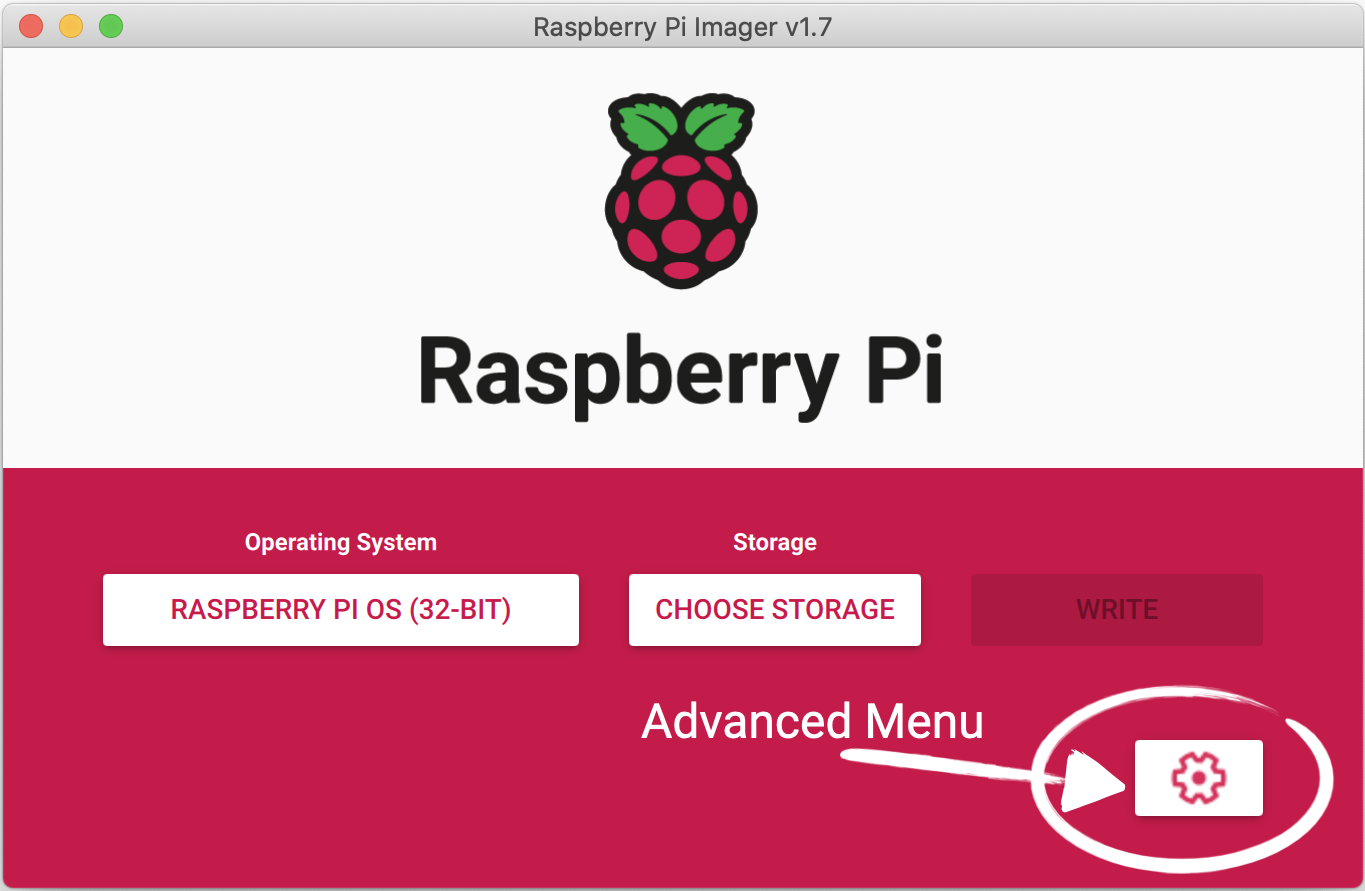
Amongst other things the Advanced Options menu is useful for when you want to configure a headless Raspberry Pi.
|
Note
|
In older versions of Imager you should push Ctrl-Shift-X to open the "Advanced" menu.
|
If you are installing Raspberry Pi OS Lite and intend to run it headless, you will still need to create a new user account. Since you will not be able to create the user account on first boot, you MUST configure the operating system using the Advanced Menu.
Downloading an Image
If you are using a different tool than Raspberry Pi Imager to write to your SD Card, most require you to download the image first, then use the tool to write it to the card. Official images for recommended operating systems are available to download from the Raspberry Pi website downloads page. Alternative operating systems for Raspberry Pi computers are also available from some third-party vendors.
You may need to unzip the downloaded file (.zip) to get the image file (.img) you need to write to the card.
|
Note
|
The Raspberry Pi OS with desktop image contained in the ZIP archive is over 4GB in size and uses the ZIP64 format. To uncompress the archive, an unzip tool that supports ZIP64 is required. The following zip tools support ZIP64: 7-Zip for Windows, The Unarchiver for macOS, and unzip on Linux. |
Installing over the Network
Edit this on GitHub
|
Warning
|
Network installation is only enabled by default on Raspberry Pi 4 and Raspberry Pi 400, and only when using the latest supported bootloader. See Updating to the LATEST / STABLE bootloader for details of how to update your bootloader. |
When you get a new Raspberry Pi, you also need an SD Card with an operating system installed on it. The easiest way to get the operating system onto the SD Card is to use the Raspberry Pi Imager application running on another computer to copy it to your SD Card.
But how do you get the operating system onto your SD card if you don’t have another computer?
If you do not have another computer to run Raspberry Pi Imager you can start the application directly on a Raspberry Pi 4 or Raspberry Pi 400 by connecting it to the Internet with an Ethernet cable. This will allow you to install the operating system onto a blank SD Card directly from the network without using another computer.
Using Network Installation
You will need a keyboard to make use of the network installation feature. While a Raspberry Pi 400 always has a keyboard "attached", if you’re using a Raspberry Pi 4 you will need to plug in a USB keyboard.
Either insert a blank SD Card into the SD card slot of your Raspberry Pi, or press and hold the SHIFT key.
Power on your Raspberry Pi. As always it will first look for an SD Card, and then a USB drive, to find bootable media. However if you have a keyboard attached, the Raspberry Pi will now show the network installation screen.
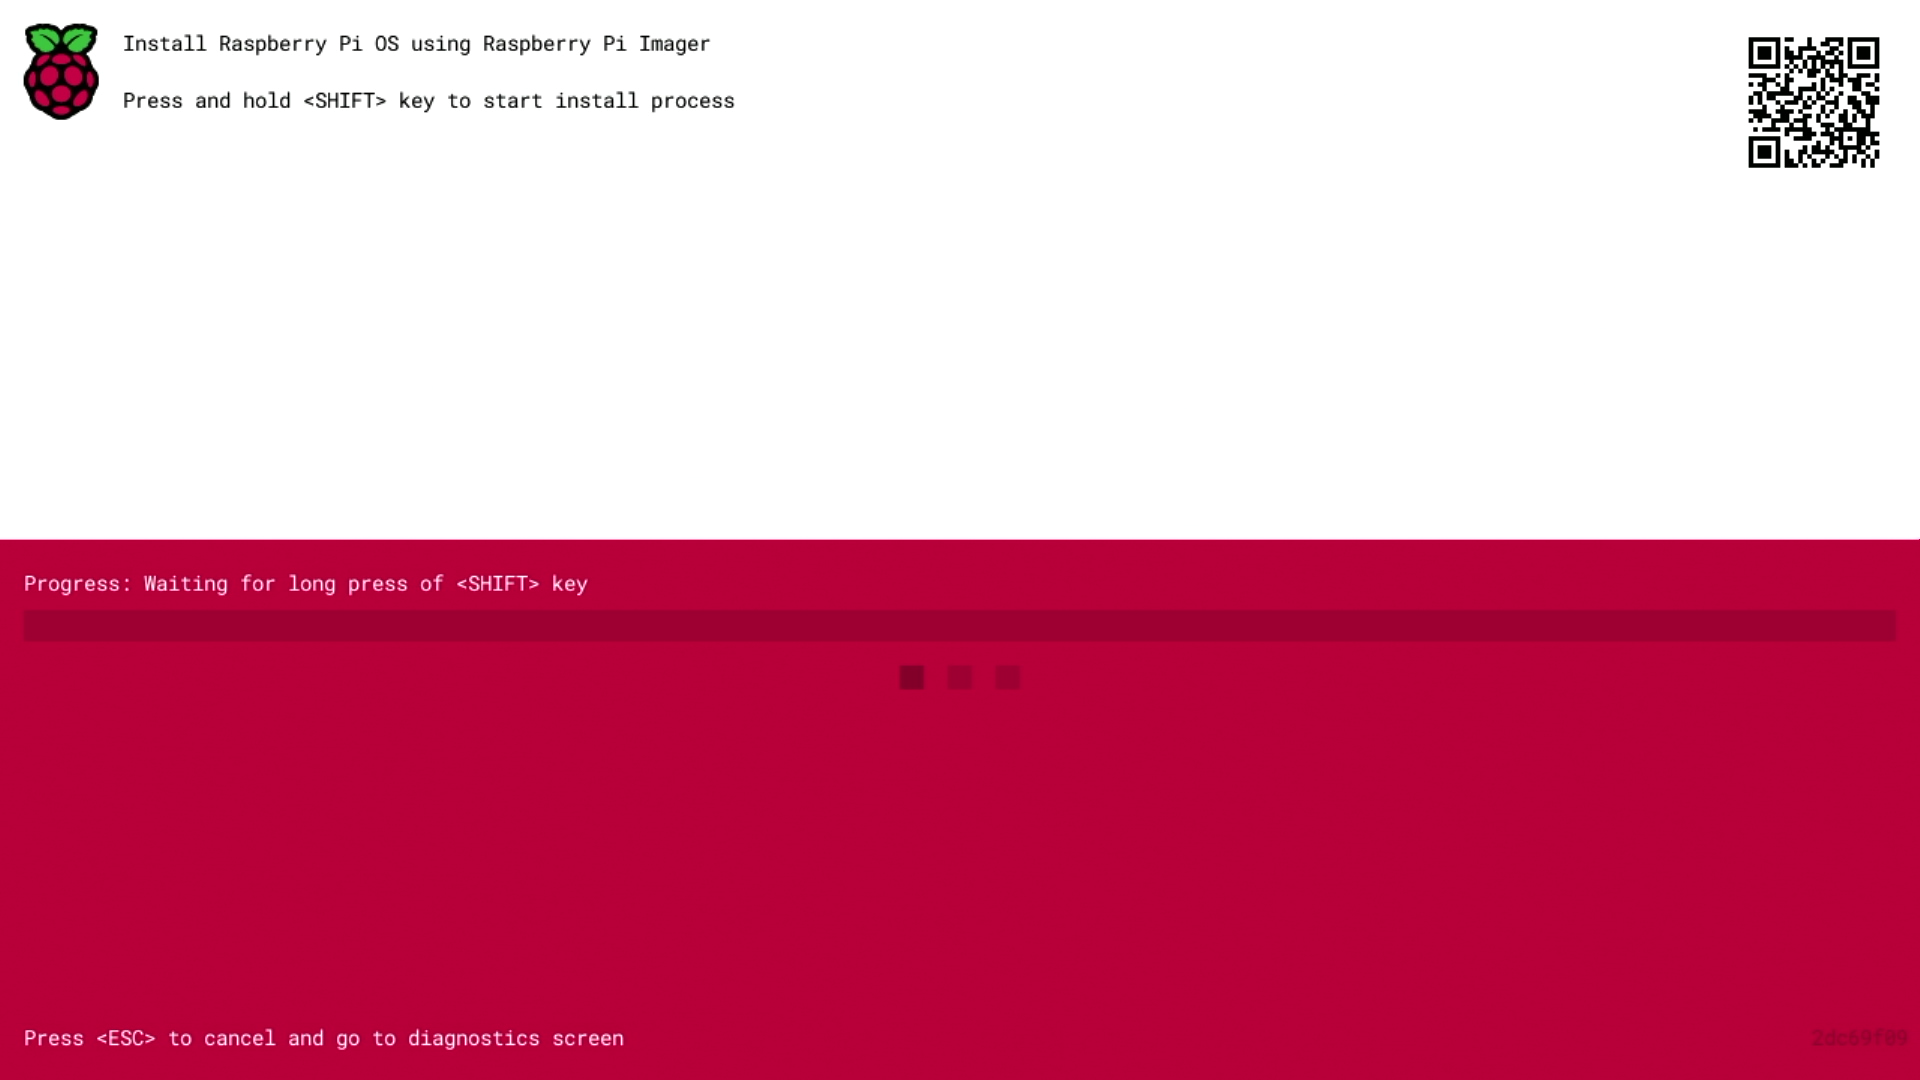
In the background the Raspberry Pi is still looking for a bootable image, but you can now start a network installation by holding down the SHIFT key. You will then be prompted to connect your Raspberry Pi to the network with an Ethernet Cable.
|
Note
|
You can also start network install by holding SHIFT when powering on the device.
|
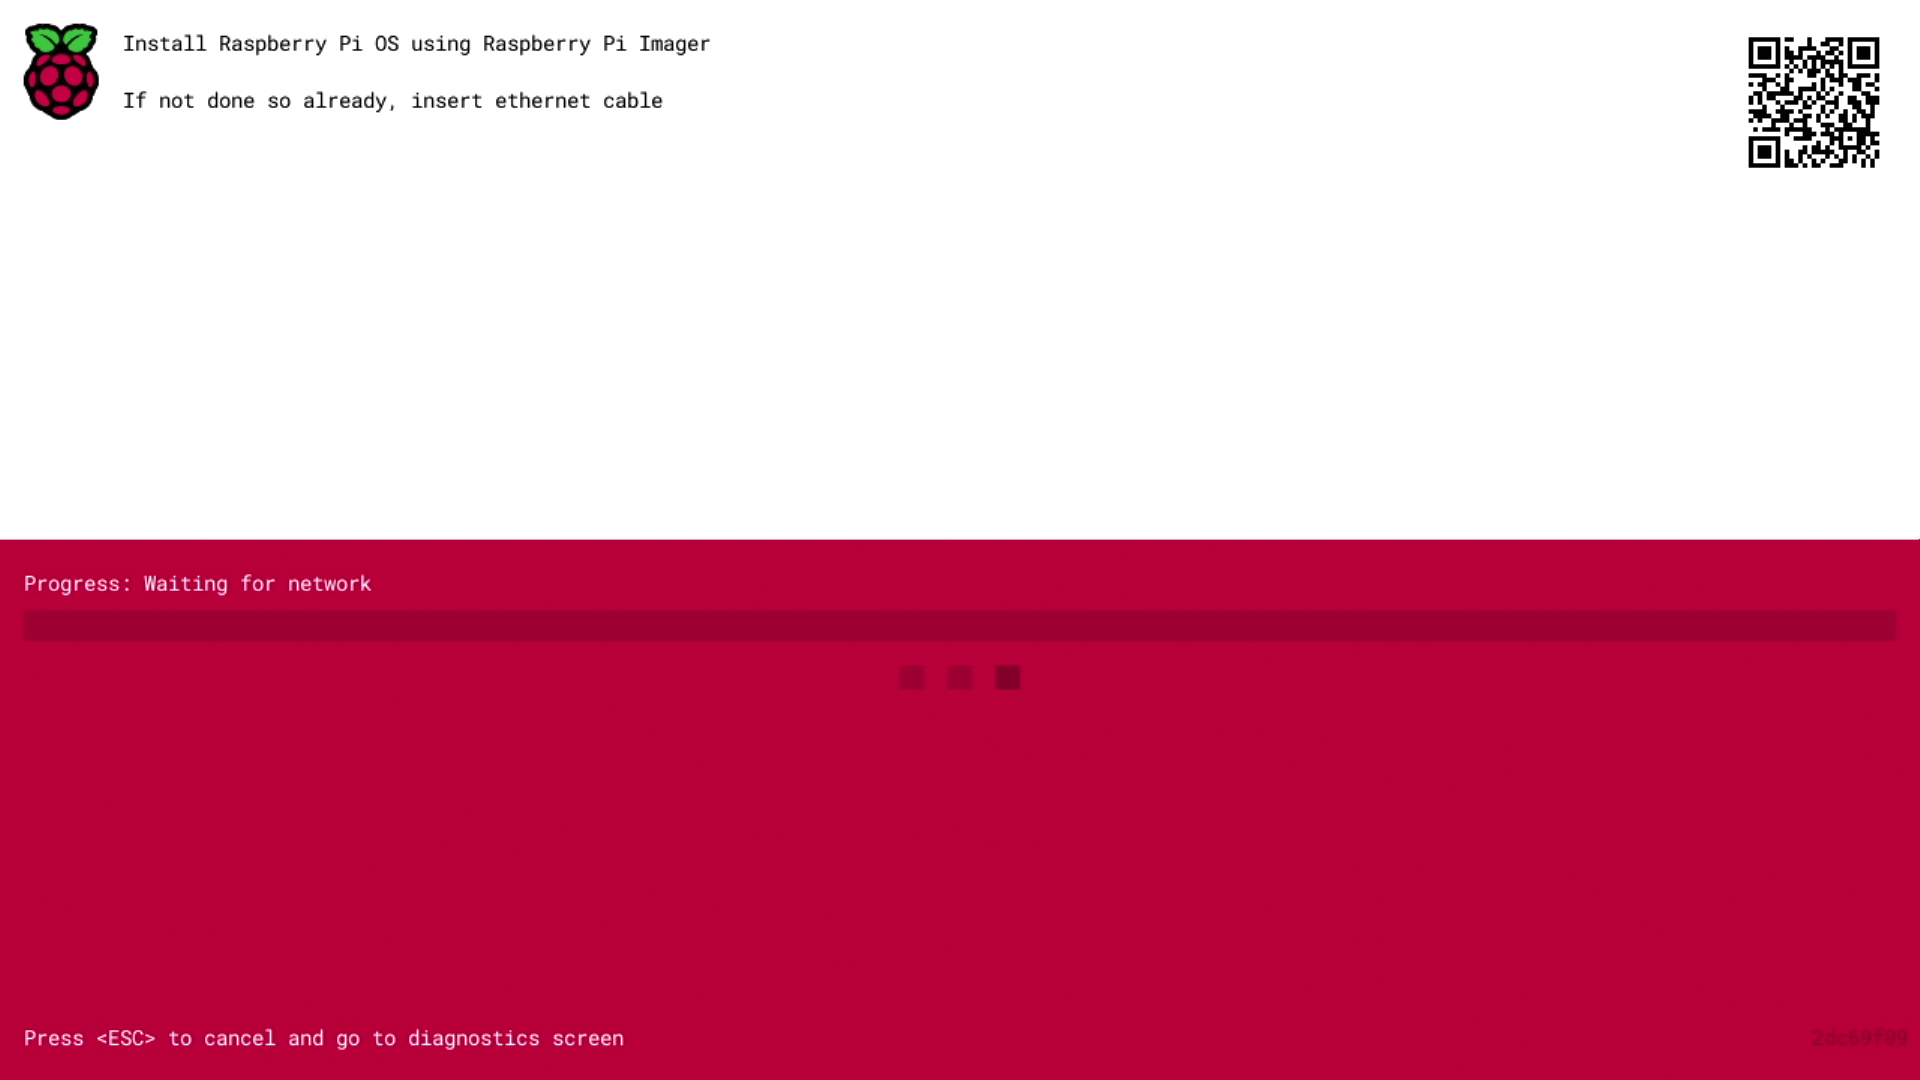
Plug your Raspberry Pi into the network using an Ethernet cable. When it detects a cable has been inserted it should start downloading the Raspberry Pi installer. If the download fails, you can repeat the process to try again.
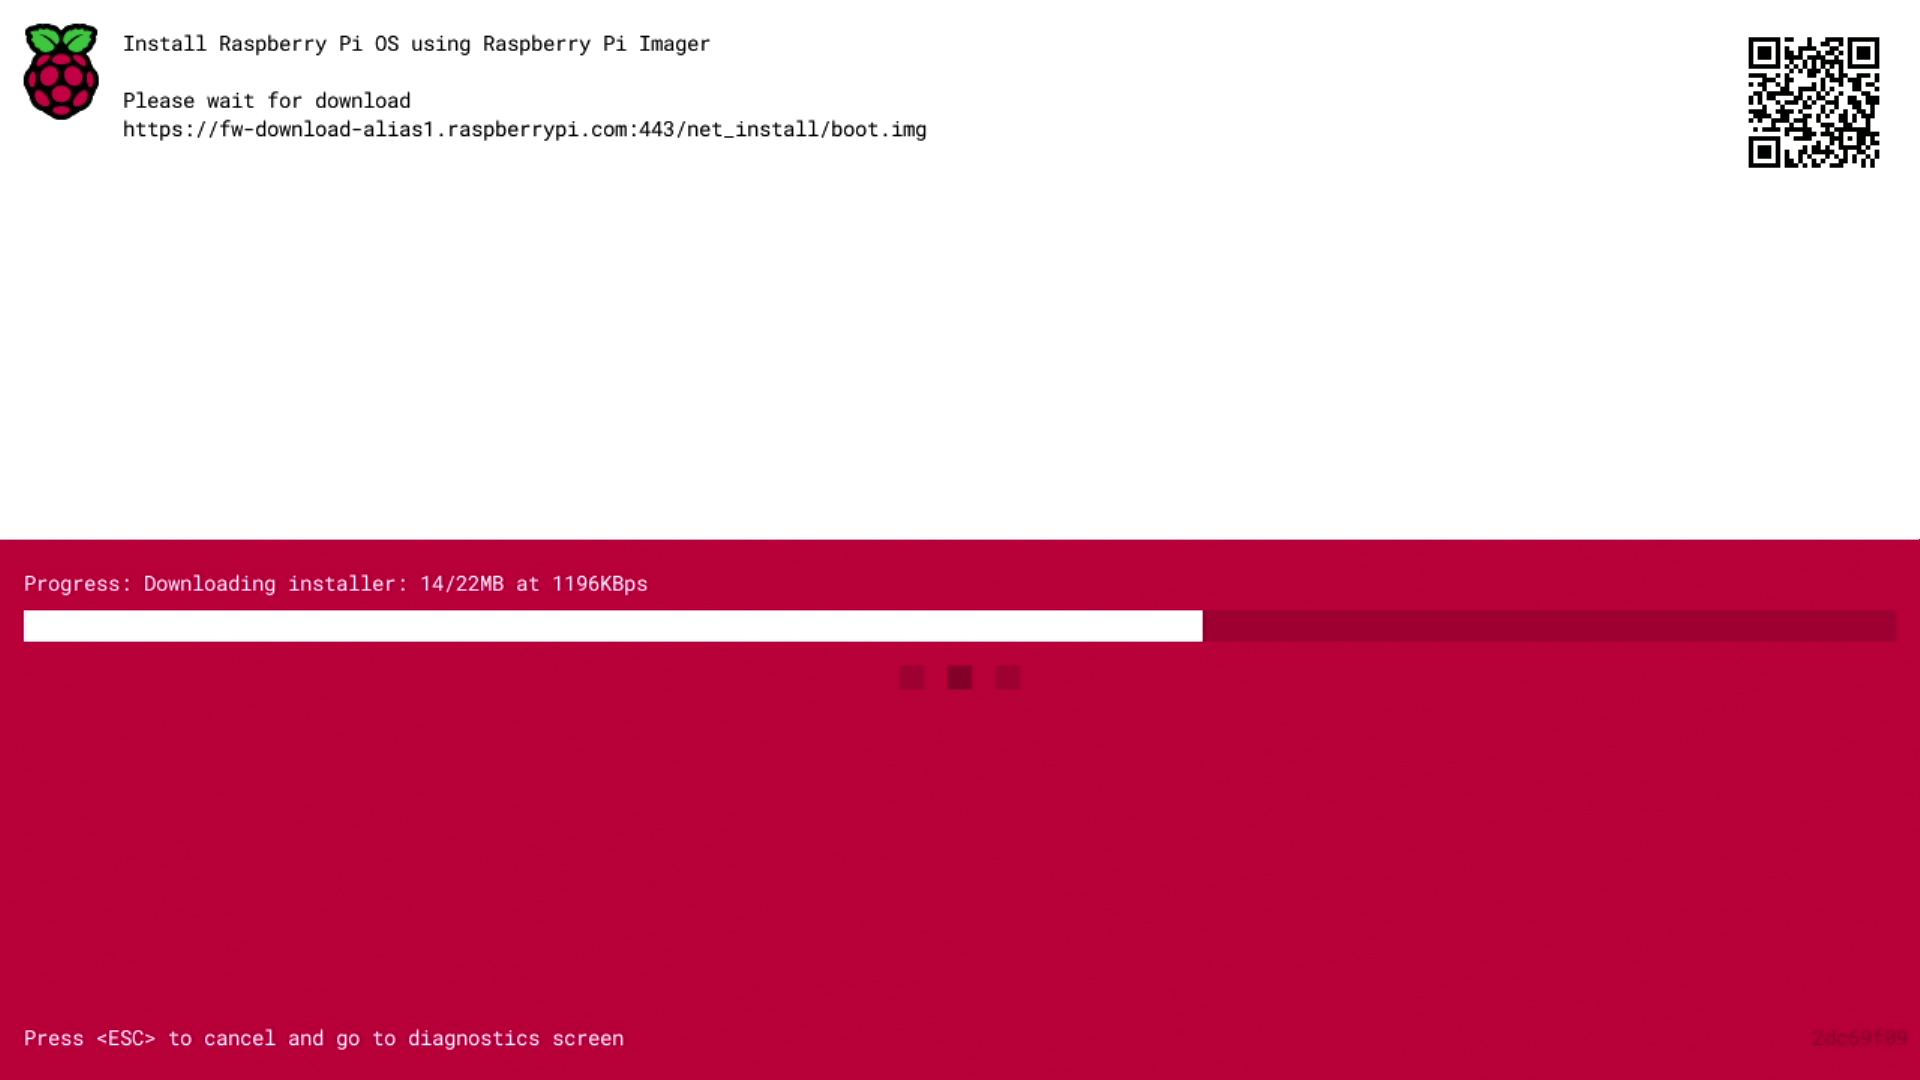
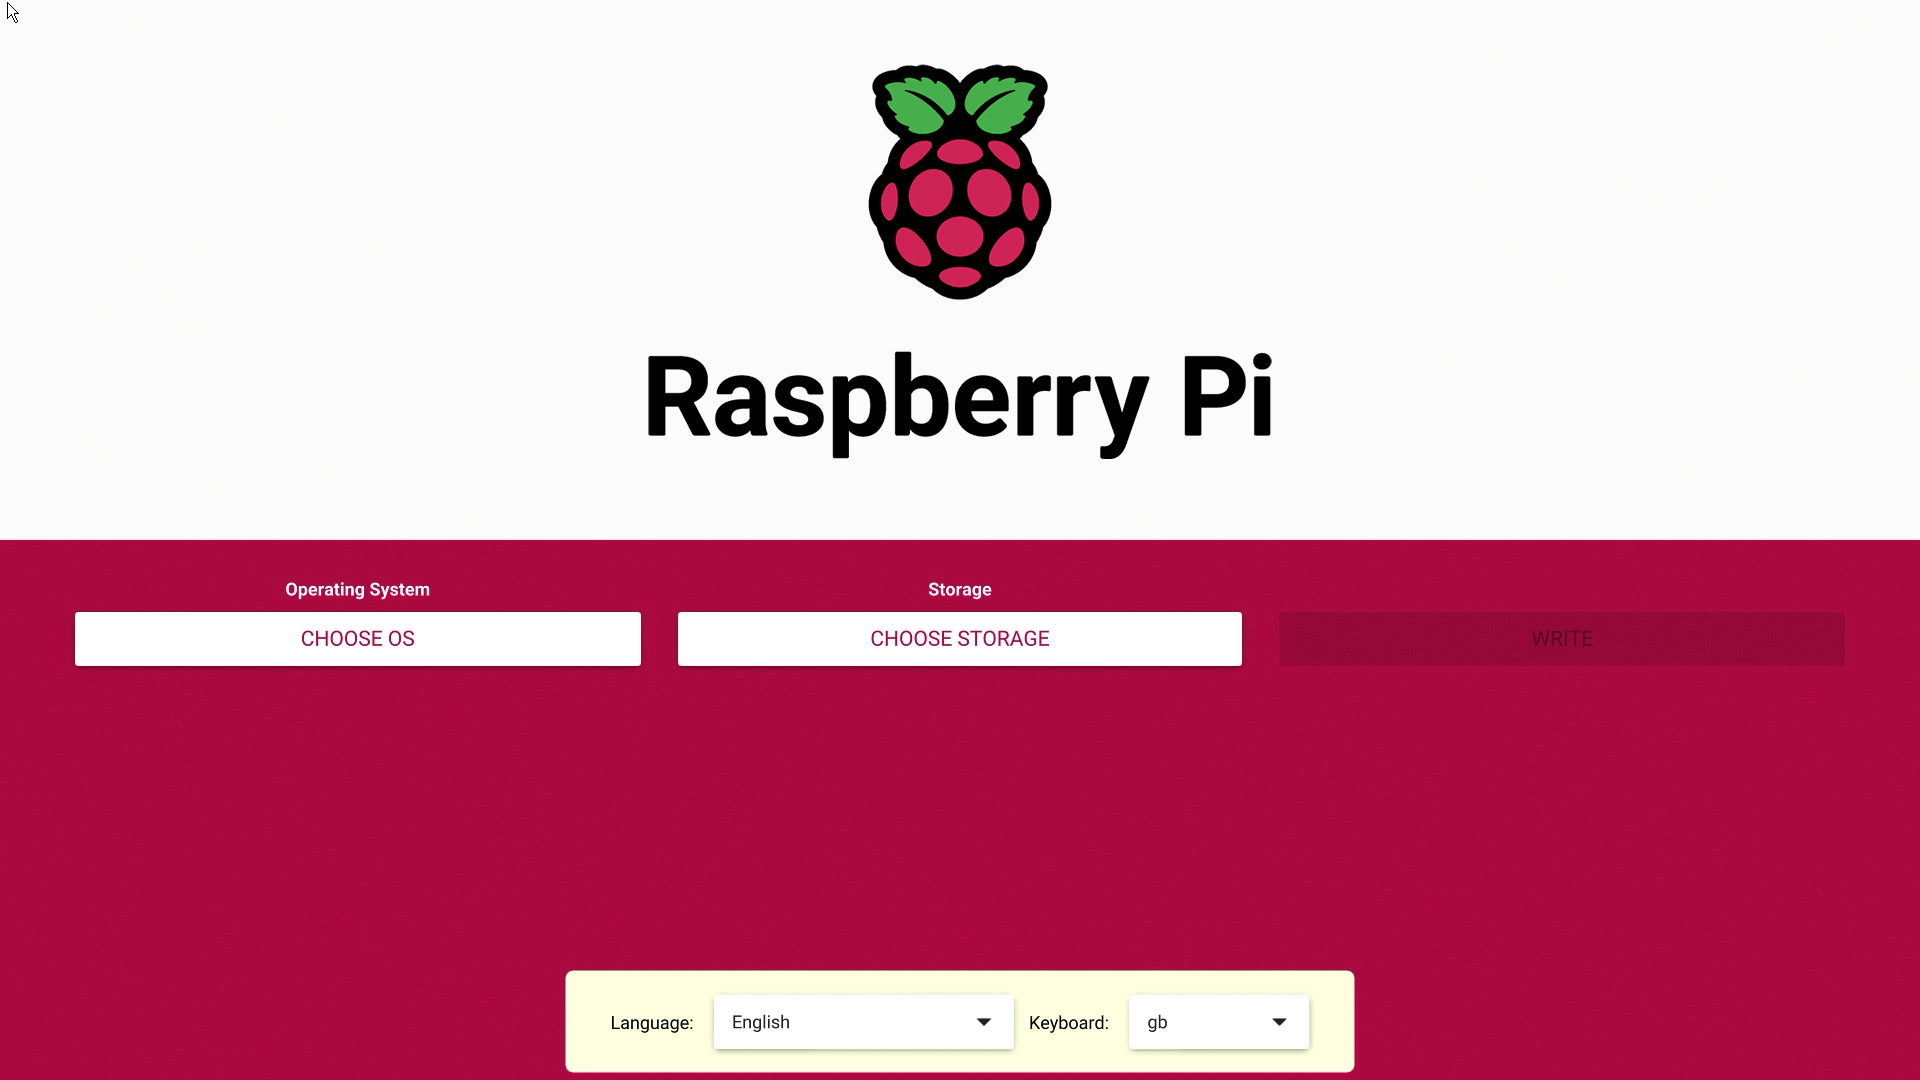
Eventually it should start the Raspberry Pi Imager application allowing you to install a full operating system to a blank SD Card or a USB Drive.
|
Note
|
More information can about using the Raspberry Pi Imager can be found in the section on installing your operating system. |
After installing the operating system onto your blank SD Card you will no longer see the network installation screen on boot. If you do want to run it, you can hold down the SHIFT key while powering on the device. But take care not to overwrite any working SD cards that you want to keep!
See HTTP boot for details about how to configure network install.
Configuration on First Boot
Edit this on GitHub
If you have not already configured your operating system using the Advanced Menu of Raspberry Pi Imager when Raspberry Pi OS starts up for the first time, you will be guided through initial setup.

The Raspberry Pi OS configuration wizard will run on the first boot. The wizard starts by allowing you to configure international settings and your timezone information.
|
Note
|
If you are using a Bluetooth keyboard and mouse the first page will prompt you to put any Bluetooth keyboard or mouse you wish to use into pairing mode, and then to wait. As long as you are on the first page of the wizard, the Raspberry Pi will now scan for pairable Bluetooth mice and keyboards, and will automatically pair the first of each which it finds. You will see messages pop up to indicate that a Bluetooth device has been found and is being paired – you may need to wait a few seconds after the final “connected” dialog appears for the newly-connected device to wake up and start being used by the system. This works both with the built-in Bluetooth adapter on Raspberry Pi 3 and 4, and also with USB Bluetooth adapters on earlier models of Raspberry Pi – just make sure the USB adapter is inserted before the Raspberry Pi is booted. |

After selecting "Next" you’ll be prompted to create a user account. Here you can choose your username, and a password.

Optionally, you can set your username to the old default username of pi, which was used on older versions of Raspberry Pi OS.
|
Note
|
Some older software may require the presence of the pi user.
|
However, if you do choose to create this account you will trigger a warning message, and we’d advise you to avoid the old default password of raspberry.

After creating a user account, you can configure your screen.

Then, configure your wireless network.

Once your wireless network is configured and your Raspberry Pi has access to the Internet you will be prompted to update the operating system to the latest version. This will automatically download any patches and updates needed to update your new operating system.

Once the operating system is updated you will be prompted to reboot your Raspberry Pi.

|
Note
|
If you are installing Raspberry Pi OS Lite you must create a new user account. You will therefore be prompted to create an account by text prompts at the command line when you first boot a Lite image. If you are booting Raspberry Pi OS headless you MUST configure the operating system using Raspberry Pi Imager using the Advanced Menu. |